
Using SSL in WordPress admin
Published October 8th, 2011 under General
Unbeknownst to many internet surfers, the data you submit to a website which does not use https, is free for anyone with appropriate access to see. This includes usernames, cookies and passwords – stuff you don’t want random people finding! Often these are not easily accessible as the data may be encrypted between you and the router, or you could be hard-wired into a network, however if your network security is compromised, perhaps via a hacked home WiFi network, or by simply being on an insecure WiFi network, then all of that data is freely available to anyone with the appropriate tools. If this doesn’t sound scary to you, it should! If someone can access your cookies or even worse, your password, then they will be able to take control of your website and use it for whatever nefarious purpose they may have for it.
Any WordPress powered website is vulnerable to these sorts of issues if it hasn’t been specifically setup to avoid them. There are various ways circumvent some of these security issues, including multi-factor authentication, but by far the simplest and most effective approach is to setup an SSL certificate and force your WordPress admin panel to use https for it’s admin panel. The encryption provided by https prevents anyone from snooping on that data. Your information remains confidential from snoopers as only your browser and server are able to decrypt the data.
Typically, websites will pay for an SSL certificate which is respected by all of the major browser vendors. This provides a nice green icon in the admin panel beside where it says https. However there is no need for you to pay for an SSL certificate if you are the only one using the site. As long as you create the SSL certificate yourself, you can trust it 🙂 This is what I do here on geek.hellyer.kiwi so I thought I’d give a quick lesson on how to do it yourself.
There is a plethora of different server setups, so I’m only going to explain the most common setup here, but the same principles should apply for non cPanel setups too. Note, this may not work if your cPanel account is not setup to allow you to create new SSL certificates. If this is the case, simply contact your web host who should be able to setup a certificate for you. If they can’t, then change web hosts! There is no reason you should be forced to use your WordPress admin panel in an insecure fashion simply because of limitations in your web hosting.
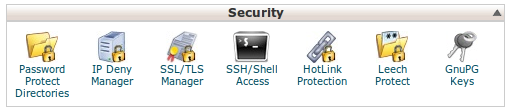
SSL link in cPanel
Click the “SSL/TLS Manager” link in cPanel …
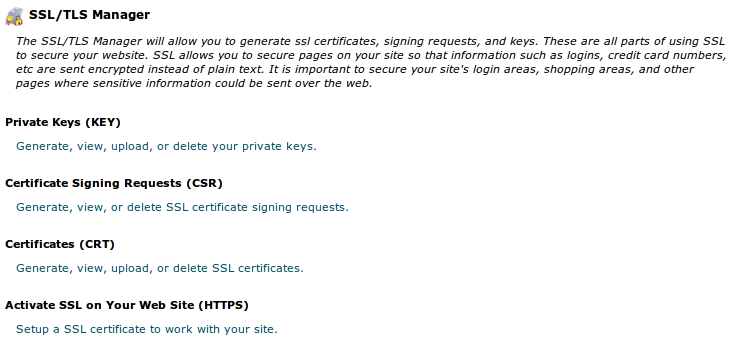
The SSL/TLS Manager provides you with links for creating a private key (KEY), certificate signing request (CSR) and a Certificate (CRT)
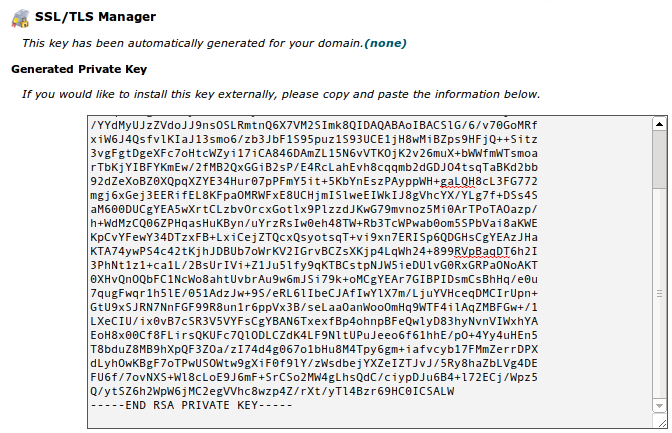
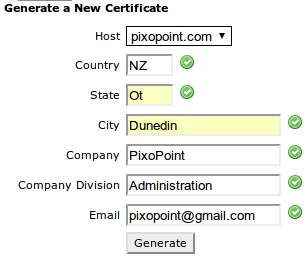
The first one you need to create is the private key. Select the domain you want to setup https for, and it will auto-populate the “Host” for you. Then click “Generate”.

You will be provided with the private key although you won’t need to do anything with this as it will be automatically carried forward by the server.
Next up, head back to the SSL/TLS manager and generate a Certificate Signing Request (CSR).
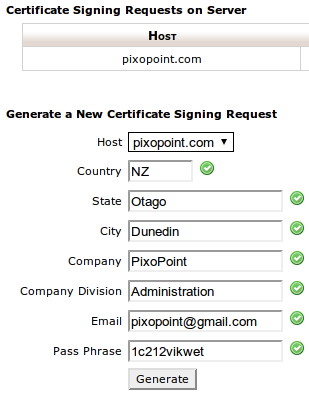
As with the private key, the generated signing request will also be carried forward by the server so you don’t need to do anything with this.

Now head back to the SSL/TLS Manager and create the certificate. The private key and signing request you have already prepared will be automatically used to create the final certificate.
This stage, you will have https working on your site, but the WordPress admin panel won’t use it by default, so you need to force it use https. To do this, you need to edit the wp-config.php file (usually found in the main folder of your WordPress installation). At this point you have a choice between only forcing the login page to use https, which protects your password from being stolen, or forcing https over the entire admin panel. Theoretically the admin panel will load slightly slower when using https, so some people do prefer to take the login https option only. But the performance hit is so minimal that I recommend simply forcing https across the entire admin panel as a further security improvement. This ensures that not only is your password secure, but also your cookies and any private posts and data which you may enter via the admin panel.
Adding the following code to the wp-config.php file will force only the login page to use https (not recommended):
define('FORCE_SSL_LOGIN', true);
Adding the following code to the wp-config.php file will force the entire admin panel to use https (recommended):
define('FORCE_SSL_ADMIN', true);
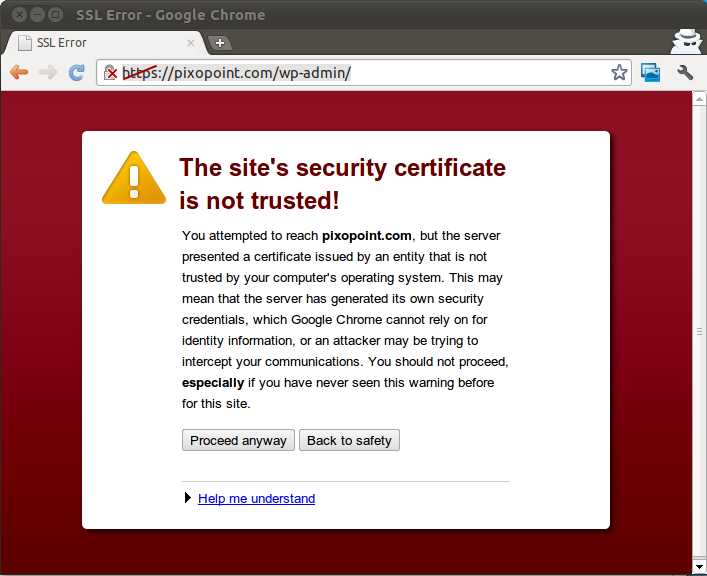
Now when you visit your sites admin panel, you will be greeted by a lovely warning message! Don’t worry, this is simply because you are using a self-signed certificate, which since you were the one that created it is perfectly okay to use. If you can afford to buy a certificate, then do so, but otherwise this free solution should be good enough for most purposes. You just need to put up with clicking past the error message whenever you visit the admin panel from another computer/browser.
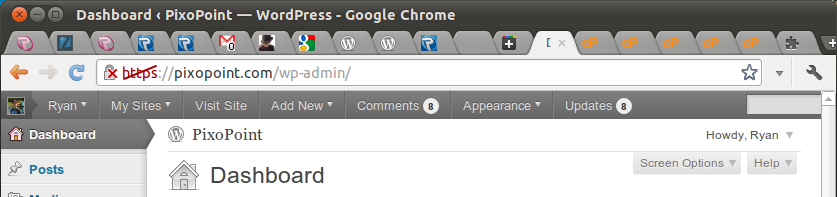
Now once you are logged into your admin panel, you should be surfing along in a totally secure admin panel which your neighbours can’t snoop in on. There will be an unpleasant looking line through “https” in your address bar, but this is not a problem due to you have signed the certificate yourself so is no cause for concern. Your admin panel is locked down nice and tight so that no prying eyes can watch what you are doing on your own site.
Multi-site
If you have a multi-site network with domain mapping, this will probably not work unless you have the domain mapping plugin set to use sub-domains of the primary domain as the admin URL for each sub-domain.
This post was heavily inspired by a similar post by Mika Epstein. Mika is an awesome contributor to the WordPress project and can often be found helping out in the support forums at WordPress.org.
Piet says:
Not working for me, throws errors: SSL received a record that exceeded the maximum permissible length. (Error code: ssl_error_rx_record_too_long)
Searching for what that means didn’t bring up anything remotely understandable…
October 9, 2011 at 9:38 am # //
Ryan says:
Darn. That sucks.
Despite having written an article on the subject, I actually know very little about this sort of thing so can’t be of much assistance sorry. I was surprised how well it worked actually. I expected it to be rather complicated by it turned out to be trivial for me when I attempted it. It sounds like your server isn’t setup to do it quite as easily as mine unfortunately.
October 9, 2011 at 11:13 am # //
daniel says:
I had the same problem as Piet, My hosting running cpanel all step were ok until I have to create the “Next up, head back to the SSL/TLS manager and generate a Certificate Signing Request (CSR).” In this part the data weren’t filled automatically by the server I had to do it manually and when I went to the page it throws the same error as piet.
October 10, 2011 at 2:14 am # //
Ryan says:
Sorry, but I have no idea how to fix that. I just know that it worked when I did it myself. If you find a solution to your problem, it would be great if you posted how you did it back here in case others are experiencing the same problem.
October 14, 2011 at 11:18 am # //
Peter Luu says:
You have to activate SSL on your website after following the Steps above, click on “Setup a SSL certificate to work with your site” if you’re using cPanel.
Peter
October 28, 2011 at 2:34 am # //
roger says:
r u using dedicated ip or shared ip ?
March 14, 2012 at 3:17 pm # //
ügyvitel says:
okay, but my hosting company skipped cPanel. Is there any workaround?
July 25, 2012 at 4:04 pm # //
Ryan says:
cPanel is definitely not needed for this. You can implement SSL without any control panel at all as you can implement it via the command line.
July 27, 2012 at 9:49 pm # //
iDating says:
Hey Ryan, there are a few plugins that currently force SSL on the admin login but it also includes the login too. Do you have a solution for just locking down the /wp-admin/ with SSL?
March 14, 2014 at 12:44 pm # //
Ryan Hellyer says:
I don’t understand your question sorry.
March 14, 2014 at 2:18 pm # //